How to Build a Timber Pergola (DIY Guide)
Thinking about adding some structure to your garden this summer? A timber pergola is a simple yet stunning way to elevate your outdoor space — and with a bit of DIY confidence, it’s something you can build yourself.
Here’s our straightforward guide to building a strong, long-lasting timber pergola using pressure-treated timber from Wood Green Timber.
What You’ll Need (from Us)
Tools You’ll Need
-
Spirit level & tape measure
-
Post hole digger or spade
-
Drill/driver with wood bits
-
Saw (circular or handsaw)
-
Ladder & safety gear
Step-by-Step: Building a Timber Pergola
Step 1: Plan Your Layout
Decide the size and shape of your pergola — 2.4m x 2.4m is a common starting point. Mark out your post positions using string lines and pegs, checking everything’s square.
Step 2: Dig Your Post Holes
Dig holes at least 600mm deep for your upright posts. This ensures stability, especially in windy gardens.
Step 3: Set the Upright Posts
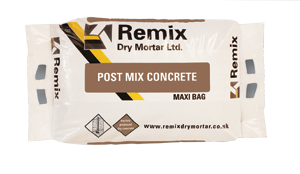
Drop each post into its hole, use a spirit level to check it’s upright, then fix with Postmix. Allow it to set firm before moving on.
Step 4: Fix the Cross Beams
Once your posts are secure, attach your main support beams along the top. These can be bolted to the outside of your uprights or notched in depending on the look you’re going for.
Step 5: Add Rafters or Slats
Space out rafters evenly across the top — you can use 47x150 or 47x100 depending on the span. Fix with screws or bolts. Decorative ends (birds-mouth, bevelled or overhangs) can add a nice touch.
Step 6: Treat, Paint or Stain
Either let your pergola weather naturally or apply a treatment to enhance its look and longevity. You can oil, paint, or stain it depending on your garden style.
Top Tip from WGT
Add a touch of privacy or style by incorporating slatted battens on one side — ideal for trailing plants or shade. We’ve got treated battens and posts in stock if you fancy that extra detail.
Ready to Build Your Own Pergola?
We’ve got all the pergola timber, posts, and fixings you’ll need — in stock and ready to deliver across North London, Hertfordshire, and beyond.
? Give us a shout or pop into our Wood Green or Potters Bar branches for advice and materials. Or check out our full timber range online!